Featured
TV Mounts
May 10, 2026
TV Wall Mount Buying Guide for Australian Installers — Fixed, Tilt & Full Motion
The display is a 75-inch commercial panel. It is sitting in its box in the boardroom, the client has a demo at 2pm, and the bracket you brought is rated to 50kg. You flip the panel spec sheet over: 42kg. That is fine. Then you look at the wall and realise the studs are 600mm centres and the bracket's mounting slots are 400mm apart.
Now you are drilling into plasterboard and hoping, or you are driving back to the supplier.
Quick answer: pick the bracket by motion type first, weight second, screen size last. Use fixed for digital signage and any flush install. Use tilt for anything mounted above eye level. Use full motion only where the panel genuinely needs to swing — corner offices, ward bays, reception desks. Then confirm the bracket's rated load is at least 1.5× the panel weight, and confirm the panel's VESA pattern before you leave the yard. Screen size ranges are a guide, not the constraint that matters.
Fixed, tilt or full motion — how to choose
Most bracket returns happen because someone bought on screen size alone. Screen size is the least useful number on the box. Start with how the panel needs to move.
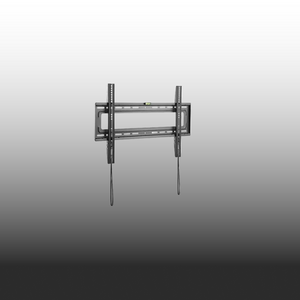
Fixed holds the panel flat and close to the wall. It is the cheapest, the strongest for its price, and the right default for digital signage, menu boards, and any panel at seated eye level. Less to go wrong, nothing to work loose.
Tilt adds vertical angle. The moment a panel goes above eye level — a gym, a pub, a waiting room, above a fireplace — you need tilt or the viewer is looking at a reflection of the ceiling. This is the most commonly under-specified option on residential jobs.
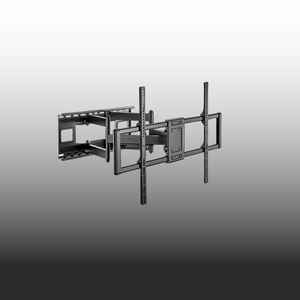
Full motion adds swivel and extension. It costs more, sits further off the wall, and puts far more leverage on the fixings. Specify it when the panel must serve two viewing positions, when you need rear access to ports after install, or when the client has asked for it and understands the trade-off.
Fixed
Tilt
Full motion
Best for
Signage, flush installs, seated eye level
Anything above eye level
Corner rooms, dual viewing positions, rear port access
Profile off wall
Slimmest
Slim
Extends 510–515mm on CERTECH full-motion arms
Load on fixings
Lowest
Low
Highest — leverage multiplies at full extension
Rear cable access after install
Poor
Limited
Good
Price range (inc GST)
$60.19 – $85.27
$76.24 – $105.34
$60.43 – $181.27
Side profile comparison of fixed, tilt and full motion TV wall mount brackets
Three cross-sections viewed from the side. A fixed bracket holds the panel flat and close to the wall. A tilt bracket angles the panel downward. A full motion bracket extends the panel away from the wall on a dual arm and swivels it.
Fixed
Slimmest profile, lowest load
on the fixings
Tilt
Vertical angle only. Required
above eye level
Full motion
extends to 510–515mm
Swivel and extension. Highest
leverage at the wall plate
Choose by how the panel needs to move. Extension figures are from the CERTECH full-motion range.
Getting the weight rating right
Match the bracket's rated load to the panel's weight without its stand. Manufacturers quote shipping weight on the carton, which includes the stand, packaging and sometimes the remote. Use the figure from the panel's specification sheet.
Then leave headroom. Work to a bracket rated at a minimum of 1.5× the panel weight. That covers the panel, plus a soundbar bracket, plus the loading someone applies when they lean on it to plug in an HDMI lead. On full-motion arms the margin matters more, because at full extension the same mass applies far greater turning force at the wall plate.
The real cost of getting this wrong: a bracket is $60 to $180 inc GST. A 75-inch commercial panel is several thousand. A callback to re-mount a panel that has sagged costs you two hours plus the trip, and the client remembers it. Specifying one tier up costs about $25 and removes the argument entirely.
What is VESA, and why it stops jobs
VESA is the standardised hole pattern on the back of the panel, quoted in millimetres as horizontal × vertical — 200×200, 400×400, 600×400, and so on. The bracket must accept the panel's pattern. Screen size does not tell you the pattern: two 65-inch panels from different manufacturers can use different ones.
Measure it before you order. Centre-to-centre, horizontally across two adjacent holes, then vertically. Check the figure against the pattern range on the product page for the bracket you are buying.
How to measure a VESA mounting pattern on the back of a panel
The rear of a flat panel display showing four mounting holes. The horizontal measurement is taken centre to centre between two adjacent holes across, and the vertical measurement centre to centre between two holes down. The pattern is quoted as horizontal by vertical in millimetres.
Measuring the VESA pattern
Rear of panel, stand removed
H — horizontal
V — vertical
Always centre of hole to centre of hole. Quoted as H × V in millimetres — for example 400 × 400.
Screen size does not predict the pattern. Two 65-inch panels from different manufacturers can differ.
If the panel's pattern falls outside the bracket's range, a VESA adapter plate is the fix. Do not improvise with longer bolts into a pattern the bracket was not built for.
What is behind the wall
The bracket is only ever as good as what it is fixed to. This is where large-panel installs fail.
Timber stud: straightforward. Fix into the stud centre, use the fixings supplied or better, and confirm you have caught timber rather than the edge.
Steel stud: do not use standard timber fixings. Steel stud requires purpose-made toggle or channel fixings, and for heavy panels a timber or steel backing plate spanning at least two studs.
Masonry and concrete: the strongest substrate, but use the correct sleeve or chemical anchor and drill to the specified depth. Do not use plastic wall plugs on anything heavy.
Plasterboard alone: not acceptable for a mounted panel of any meaningful size, regardless of the anchor on the packet. Find structure or add backing.
⚠️ Fire-rated and acoustic walls: penetrating a fire-rated wall changes its rating. On commercial fitouts, confirm the wall type on the drawings before you drill and use the specified fire-rated make-good. This is a compliance item on handover, not a detail.
Four wall substrates and whether each will carry a mounted panel
Sections through four wall types. Timber stud accepts standard fixings into the stud centre. Steel stud requires purpose-made toggle or channel fixings. Masonry requires a sleeve or chemical anchor. Plasterboard with no structure behind it will not carry a mounted panel.
Timber stud
Fix to stud centre
Confirm you have caught
timber, not the edge
Steel stud
Toggle or channel fixings
Heavy panels need backing
across two studs
Masonry
Strongest substrate
Sleeve or chemical anchor,
drilled to specified depth
Plasterboard only
void
Not acceptable
Regardless of the anchor
on the packet
The bracket is only ever as good as what it is fixed to. Identify the substrate before you choose the fixing.
The power point behind the panel
Clients almost always want the cabling hidden, which means a new GPO behind the panel. Installing or relocating a socket outlet is electrical work under AS/NZS 3000 and must be carried out by a licensed electrician. Running an extension lead inside the wall cavity to achieve the same look is not a substitute and is not compliant.
The data side is separate. Terminating structured cabling to a socket that connects to the telecommunications network requires ACMA cabling registration — Open or Restricted, depending on the work. If your scope covers the mount, the data drop and the power, make sure the right licence covers each part.
When there is no wall — ceiling mounts
Open-plan retail, gyms, hospitality floors and warehouses have the same problem: the panel needs to go where there is no wall to take it. An aisle-end display, a screen over a bar, a panel visible from both sides of a room. That is a ceiling mount, and it changes two things about how you specify.
First, the load path runs straight down through the drop pole into the structure above, so the fixing at the top is doing all the work. That fixing goes into the slab, the purlin or the joist — never the suspended ceiling tile or the grid holding it. Confirm what is above the plasterboard before you commit a fixing to it.
Second, height is now a variable you set. A telescopic drop lets you place the panel at the right level for a standing viewer, then tilt and swivel it at the head for sightlines. Get the drop right and the screen reads from across the room; get it wrong and it is either in the way or too high to watch comfortably.
A ceiling mount with a telescopic drop pole carrying a panel below the structure
A cross-section. A mounting plate fixes to the ceiling slab or joist. A telescopic drop pole hangs from it and is adjustable in height. At the base of the pole a pivot head allows the panel to tilt and swivel. The load runs straight down the pole into the structure above.
Ceiling slab, purlin or joist — never the ceiling tile
Telescopic drop
height adjustable
Tilt & swivel
at the head
load path
to structure
The top fixing carries everything. It goes into the structure above the ceiling, not the lining. CERTECH ceiling mount rated to 70kg.
The CERTECH range, mapped to the job
Every bracket below is CERTECH, held as Australian stock, and priced inc GST. Stock figures were correct at the time of writing — check the product page for current availability.
Small panels and tight spaces — 23–55"
23–55" Full Motion Wall Mount Bracket — LCDFM2355, $60.43 inc GST, rated to 35kg, arm extends to 515mm. Best for: ward bays, reception desks, small offices where one panel serves two seats.
Standard commercial and residential — 32–55"
32–55" Fixed Wall Mount Bracket — LCDFX3255, $60.19 inc GST, rated to 50kg. Best for: menu boards and signage at seated eye level.
32–55" Tilt Wall Mount Bracket — LCDT3255, $76.24 inc GST, rated to 50kg. Best for: panels above eye level in cafes, gyms and waiting rooms.
32–55" Full Motion Wall Mount Bracket — LCDFM3255, $108.90 inc GST, rated to 50kg, dual arm extending 510mm. Best for: corner installs needing genuine swivel.
Boardrooms and larger displays — 37–70"
37–70" Fixed Wall Mount Bracket — LCDFX3770, $69.22 inc GST, rated to 50kg. Best for: boardroom panels sitting flush.
37–70" Tilt Wall Mount Bracket — LCDT3770, $85.27 inc GST, rated to 50kg. Best for: training rooms and elevated mounts.
37–70" Full Motion Wall Mount Bracket — LCDFM3770, $103.59 inc GST, rated to 50kg, dual arm extending 510mm. Best for: rooms where the panel serves both a table and a lectern position.
Large format and video wall — 60–120"
60–120" Fixed Wall Mount Bracket — LCDFX60120, $85.27 inc GST, rated to 120kg, quick-release spring lock and cable management. Best for: large-format signage and auditorium displays.
60–120" Tilt Wall Mount Bracket — LCDT60120, $105.34 inc GST, rated to 120kg. Best for: high-mounted large panels in pubs, clubs and foyers.
60–120" Full Motion Wall Mount Bracket — LCDFM60120, $181.27 inc GST, rated to 120kg, with tilt, swivel and extension. Best for: the small number of large-format jobs that genuinely need articulation. Confirm your substrate first.
No wall available — ceiling mount
43–86" Ceiling Mount Bracket — LCDCM4386, $89.65 inc GST, rated to 70kg, with tilt, swivel, a telescopic height-adjustable drop and cable management through the pole. Best for: aisle-end retail displays, screens over a bar, gym and warehouse panels, and any double-sided viewing position where no wall is available. Fix the head to the slab or joist, never the suspended ceiling.
On-site checklist
Get the panel weight from the specification sheet, not the carton.
Measure the VESA pattern centre-to-centre, horizontal and vertical.
Choose motion type by how the panel needs to move, not by screen size.
Select a bracket rated to at least 1.5× the panel weight.
Identify the substrate and confirm you have structure, not just plasterboard.
Check the drawings for fire-rated or acoustic wall construction before drilling.
Confirm mount height — centre of screen at seated eye level unless the brief says otherwise.
Book the licensed electrician for any new GPO, and confirm ACMA registration covers the data drop.
Dry-fit the wall plate and check level across the full width before final fixing.
Dress and secure cabling before the panel goes on, especially on fixed brackets.
Frequently asked questions
Can I mount a TV on plasterboard without hitting a stud?
Not for anything of meaningful size. Plasterboard anchors are rated for picture frames and light shelving, not a panel on a lever arm. Find the studs, or fit a timber or steel backing plate spanning at least two studs and fix the bracket to that.
How do I work out the VESA pattern?
Measure centre-to-centre between two adjacent mounting holes on the back of the panel — horizontally first, then vertically. That gives you a figure like 400×400 in millimetres. Check it against the bracket's stated range before ordering, because screen size does not predict it.
Do I need a licensed electrician to install a TV bracket?
Not for the bracket itself. You do need a licensed electrician for any new or relocated power point under AS/NZS 3000, which most concealed-cable installs require. Data cabling connected to the telecommunications network requires ACMA cabling registration.
What height should the panel be mounted at?
Centre of screen at seated eye level for boardrooms, lounges and waiting areas — roughly 1000 to 1200mm from finished floor level depending on seating. Signage and pub installs go higher by necessity, which is exactly when you specify tilt rather than fixed.
Is full motion worth the extra cost?
Only when the panel genuinely needs to move. It costs more, sits further off the wall, and loads the fixings harder. If the client wants it for rear port access rather than viewing angle, a fixed bracket plus a properly planned cable run usually serves better for less.
Can one bracket handle a curved panel?
The CERTECH fixed and tilt brackets in the 32–55" and 37–70" ranges are specified for curved and flat panels. Confirm the VESA pattern as normal, and note that curved panels sit slightly further off the wall at the edges.
The bottom line
Choose the motion type by how the panel has to move, then confirm the bracket is rated to at least 1.5× the panel's true weight, then check the VESA pattern. Screen size is the last thing to worry about, not the first. Fixed suits most signage and flush installs, tilt is mandatory above eye level, and full motion earns its cost only where the panel genuinely needs to swing. Whatever you choose, the substrate behind the wall decides whether it holds.
Order from SparkyZone
Browse the full TV wall mount and bracket range. Every bracket is held as Australian stock with local warranty support. Order before 2pm AEST Monday to Friday for same-day dispatch. Free shipping on orders over $300, Australia-wide including regional. ABN invoicing available on every order, and 30-day hassle-free returns.
Need a bracket schedule priced against a drawing set? Send the BOM to sales@sparkyzone.com.au and we will quote it. Mon–Fri 8am–5pm, Sat 9am–1pm.
Related guides
Cat6A cable roll buying guide for Australian installers — specifying the data drop that feeds the panel.
AS/CA S008 cabling compliance in plain English — what registration you need for the cabling side of an AV install.
References
AS/NZS 3000 — Electrical installations (Wiring Rules), for socket outlet installation requirements.
AS/CA S008 — Requirements for customer cabling products and installation.
CERTECH product specifications for the LCDFX, LCDT and LCDFM bracket series.
Pricing and stock verified against live SparkyZone catalogue data, 24 July 2026. All prices AUD inc GST.
Read article